
The Best Fluffy Pancakes recipe you will fall in love with. Full of tips and tricks to help you make the best pancakes.

Chocolate Peanut Butter Greek Yogurt Dessert Cups

These individual Greek yogurt dessert cups features a creamy, whipped peanut butter yogurt base topped with a crisp, crackly chocolate shell. It is a simple, no-bake approach to a classic flavor combination that works well for those who want a portioned treat ready in the refrigerator for the week ahead.
This recipe is particularly useful for busy households because it requires only five ingredients and very little active prep time. By using small jars or ramekins, you create a convenient grab-and-go format that stays fresh in the fridge, making it an excellent option for midweek dessert planning without any actual baking involved.

What You’ll Need
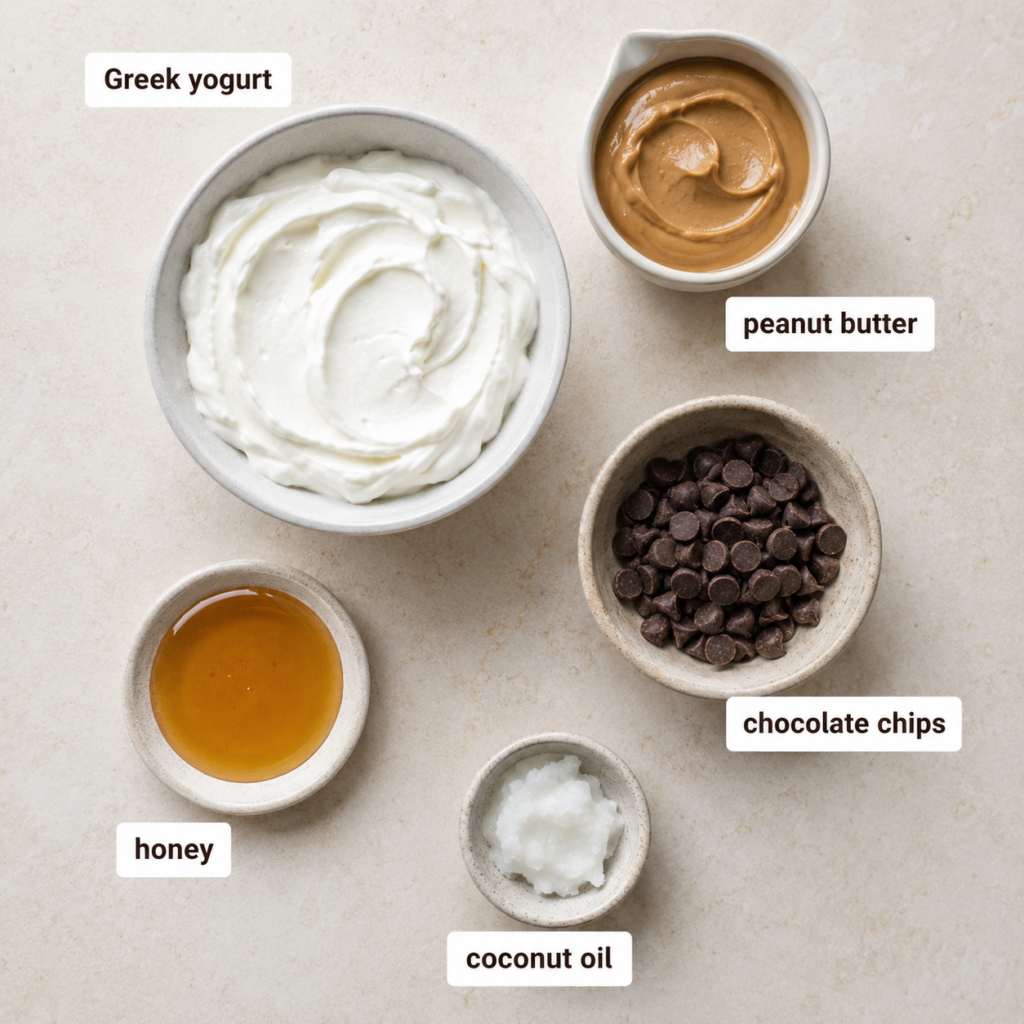
The success of these dessert cups relies on a few simple pantry and fridge staples. Using a thick yogurt ensures the base remains stable and fluffy once it is whipped with the peanut butter and honey.
- Plain Greek yogurt: Preferably full-fat for the creamiest texture and most satisfying mouthfeel.
- Peanut butter: This is mixed directly into the yogurt to provide that signature nutty flavor and richness.
- Honey: Used as the primary sweetener to balance the tang of the Greek yogurt.
- Semi-sweet chocolate chips: These are melted down to form the hard upper layer of the cup.
- Coconut oil: A small amount is measured before melting to help the chocolate achieve the right consistency for a breakable shell.
How to Make It
The preparation flow for these no-bake dessert cups is straightforward. The most important part of the technique is the mixing stage, where you transform the dense yogurt into something light and airy before adding the chocolate topping.
- In a medium-sized mixing bowl, add the Greek yogurt, peanut butter, and honey.
- Use a spoon to mix the ingredients thoroughly. Continue mixing until the components are fully incorporated and the yogurt takes on a fluffy, whipped texture.
- Divide the mixture evenly between small jars or ramekins. Using 4-ounce containers helps with consistent portioning.
- In a small bowl, combine the semi-sweet chocolate chips and the coconut oil.
- Place the bowl in the microwave and heat in increments of 30 seconds to 1 minute until the chocolate is completely melted and smooth.
- Carefully drizzle the melted chocolate over the top of each yogurt-filled cup, spreading it to the edges to form a seal.
- Transfer the cups to the freezer for approximately 15 minutes to allow the chocolate shell to harden. Do not leave them in the freezer for longer than 30 minutes.
- Once set, use the back of a spoon to crack the hardened chocolate layer into pieces and mix it into the yogurt before eating.
Get the Chocolate Shell Right
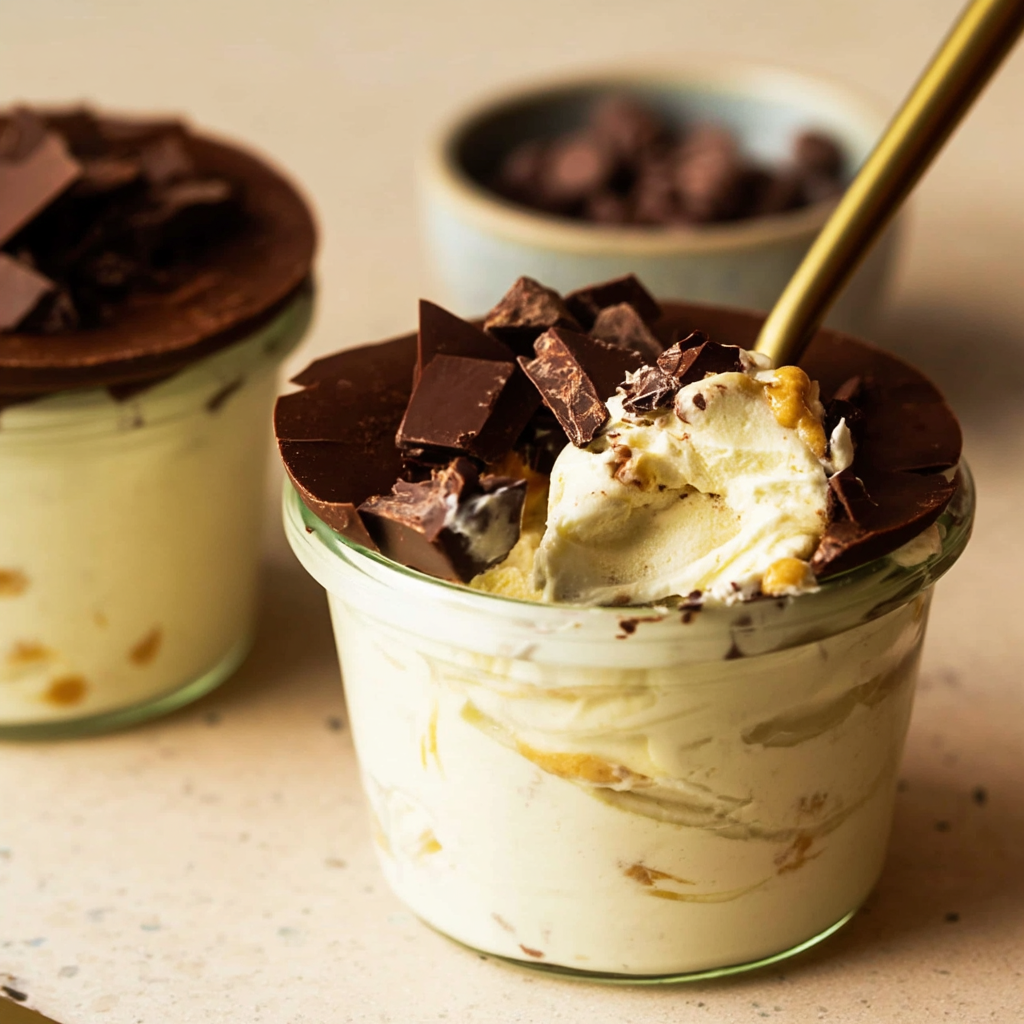
The chocolate shell is the defining characteristic of this dessert. To get that perfect snap, the combination of chocolate chips and coconut oil is essential. The oil lowers the melting point slightly and ensures the chocolate doesn’t become too brittle to drizzle, yet still sets firmly when chilled.
When you place the cups in the freezer, you are only looking for the chocolate to go from a liquid state to a solid, matte finish. This usually takes about 15 minutes. It is vital to set a timer because if the cups stay in the freezer for more than half an hour, the yogurt base will begin to freeze and lose its fluffy, whipped consistency. Once the shell is firm to the touch, move the cups immediately to the refrigerator.
Yogurt Base Notes
The peanut butter yogurt base should be smooth and airy. While you can use different types of yogurt, plain Greek yogurt is preferred because its thick consistency holds up well to the addition of honey and peanut butter. If you use a thinner variety of yogurt, the base may become too runny to support the weight of the chocolate layer.
Using small jars or ramekins, specifically the 4-ounce size, ensures that you have the right ratio of chocolate to yogurt in every bite. If the container is too wide, the chocolate layer becomes too thin; if it is too narrow, the shell becomes too thick to crack easily with a spoon. If you enjoy a variety of textures in your refrigerated treats, you might also like this Jello yogurt fluff for another simple chilled option.
No-Bake Dessert Cup Tips
When assembling your chocolate peanut butter dessert cups, try to smooth the top of the yogurt mixture before adding the chocolate. A flat surface allows the melted chocolate to spread evenly, creating a uniform shell that is satisfying to break. This method is similar to how you might prepare other spoonable treats like chocolate protein pudding.
If you are preparing these as part of a meal prep routine, ensure your ramekins have tight-fitting lids. If you are using open ramekins, a layer of plastic wrap pressed close to the surface (after the shell has fully hardened) will help prevent the yogurt from picking up any stray odors from the refrigerator. Proper sealing also maintains the moisture level of the whipped base, keeping it light for several days.
How to Store Them
After the 15-minute hardening period in the freezer, these refrigerated dessert cups must be kept in the fridge. They are not intended for long-term freezer storage. When kept in the refrigerator and covered with a lid or plastic wrap, these cups will stay fresh and delicious for up to one week.
Since there is no cooking involved, there is absolutely no need for reheating. These are meant to be enjoyed cold, straight from the fridge. The contrast between the cold, creamy yogurt and the room-temperature snap of the chocolate provides the best eating experience. For fans of creamy, chilled sweets, another great make-ahead choice is this banana pudding.
Frequently Asked Questions
Can Greek yogurt dessert cups be frozen?
You should only use the freezer for about 15 minutes to set the chocolate shell. Do not leave them in the freezer longer than 30 minutes, as the yogurt texture will change and become icy rather than fluffy. For best results, store them in the refrigerator.
How long do they last in the refrigerator?
When properly covered with a lid or plastic wrap, these dessert cups will last for up to one week in the fridge. This makes them a great option for prepping several days of treats at once.
What size jars or ramekins work best?
Small 4-ounce jars or ramekins are the best choice for this recipe. This size provides the perfect portion and allows the chocolate shell to form a sturdy layer over the yogurt base without being too difficult to crack.
Why add coconut oil to the chocolate?
Coconut oil helps the chocolate chips melt into a smoother consistency, making it easier to drizzle. More importantly, it helps the chocolate set into a shell that is firm but still easy to break with a spoon once chilled.
Conclusion
Making these Chocolate Peanut Butter Greek Yogurt Dessert Cups is a practical way to keep a pre-portioned, no-bake treat on hand. By focusing on a fluffy whipped base and that signature crackly shell, you get a satisfying texture contrast in every spoonful. Just remember to keep the freezer time short and store your covered cups in the refrigerator for the best results throughout the week. If you find yourself enjoying these yogurt-based sweets, you may also want to try a Greek yogurt cheesecake for your next kitchen project.
Print
Chocolate Peanut Butter Greek Yogurt Dessert Cups
- Total Time: 30
- Yield: 6 dessert cups
- Diet: Vegetarian
Description
Creamy Greek yogurt and peanut butter base layered with a cracky chocolate shell. No-bake, portable desserts perfect for midweek treats.
Ingredients
1 1/2 cups full-fat Greek yogurt
3/4 cup creamy peanut butter
1/4 cup honey
1 cup semi-sweet chocolate chips
1 tbsp coconut oil
Instructions
In a bowl, combine Greek yogurt, peanut butter, and honey. Mix until fluffy. Divide into 4-ounce jars. In a microwave-safe bowl, melt chocolate chips and coconut oil until smooth. Drizzle over yogurt cups. Freeze 15 minutes until hardened. Crack the shell with a spoon before serving.
Notes
Use full-fat yogurt for best texture
Portions store in fridge for up to 3 days
Add granola for crunch if desired
- Prep Time: 15
- Category: Deserts
- Method: No-Bake
- Cuisine: American


