
The Best Fluffy Pancakes recipe you will fall in love with. Full of tips and tricks to help you make the best pancakes.

Mini Greek Yogurt Cheesecake for Two

This recipe brings you a delightful Greek yogurt cheesecake, designed specifically as a small-batch dessert. It’s perfect for those times you want a light, satisfying treat without a large production. This creamy delight is made efficiently in mini jars or ramekins, baked until set, and then chilled until it’s perfectly cold and firm.
What makes this cheesecake truly special is its focus on 2% plain Greek yogurt as the star ingredient, replacing traditional cream cheese. The result is a smooth, tangy, and subtly sweet dessert that offers a wonderful contrast to its fresh strawberry and honey topping. It’s a simple, comforting option for a relaxed evening or a peaceful breakfast.

What You’ll Need
The ingredients for this Greek yogurt cheesecake prioritize simplicity and the unique texture that Greek yogurt provides. Each component plays a specific role in creating a smooth, set filling that’s distinct from a traditional cream cheese-based recipe.
- 1 cup 2% plain Greek yogurt: This is the foundation of our cheesecake, offering its characteristic tang and creamy texture without the richness of cream cheese.
- 1/3 cup granulated sugar: Provides the right balance of sweetness to complement the yogurt’s tartness.
- 1 large egg: Helps bind the ingredients and contributes to the cheesecake’s structure.
- 1 egg white, from 1 large egg: Adds extra structure and a lighter texture to the filling.
- 1/2 teaspoon vanilla bean paste, or 1 teaspoon vanilla extract: Brings a warm, familiar aroma and flavor. Either option works well here.
- 1 1/2 teaspoons cornstarch: This is key for helping the cheesecake set properly without the need for a long list of stabilizers.
- For the topping:
- 2 cups strawberries, cored and sliced: A fresh and bright counterpoint to the creamy cheesecake.
- Drizzle of honey: Adds a natural sweetness and a lovely shine to the finished dessert.
How to Make It
Preparing this Greek yogurt cheesecake involves a straightforward process of whisking, baking, and chilling. The steps are designed to be clear, ensuring a smooth and successful outcome that results in a perfectly set dessert.
- Preheat your oven to 375°F. Lightly grease two small jars or ramekins to prevent sticking.
- In a medium bowl, whisk together the 2% plain Greek yogurt, granulated sugar, large egg, egg white, vanilla bean paste (or vanilla extract), and cornstarch until the mixture is completely smooth.
- Carefully divide the whisked mixture evenly between the two prepared jars or ramekins.
- Bake the cheesecakes for approximately 26 minutes, or until you can see that they are set.
- Once baked, remove them from the oven and allow them to cool down completely to room temperature. After cooling, transfer them to the refrigerator and chill until they are fully cold and set throughout.
- Before serving, top each individual cheesecake with your sliced strawberries and a pleasant drizzle of honey.
Whisk Until Smooth
Achieving a smooth consistency in your cheesecake filling is a simple but important step for this small-batch dessert. Before the mixture goes into your mini jars or ramekins, ensure that all ingredients are well combined. The 2% plain Greek yogurt, egg, egg white, sugar, vanilla, and cornstarch should form a cohesive, lump-free batter.
A good whisking ensures that the cornstarch is fully incorporated, which is crucial for the cheesecake to set correctly during baking. This careful mixing also helps to distribute the flavors evenly, leading to a consistent taste and texture in every bite.
Bake Until Set
The baking process for this Greek yogurt cheesecake is quite precise. You’ll be baking these individual portions for around 26 minutes at 375°F. The main indication that they are ready is when they appear set. This means the surface of the cheesecake should look firm and no longer liquid or jiggly in the center when gently nudged.
Trusting this visual cue is key. Once set, the cheesecakes have developed the internal structure needed to hold their shape after chilling. There’s no need to look for browning or significant rising; the key is simply for the cheesecake to be firm.
Chill Before Serving
The final step for these delightful mini jars of cheesecake is perhaps the most crucial for their texture: chilling. After baking and cooling to room temperature, the cheesecakes need a significant amount of time in the refrigerator. This period, included within the 4 hours of prep time, allows the cheesecake to become fully cold and set.
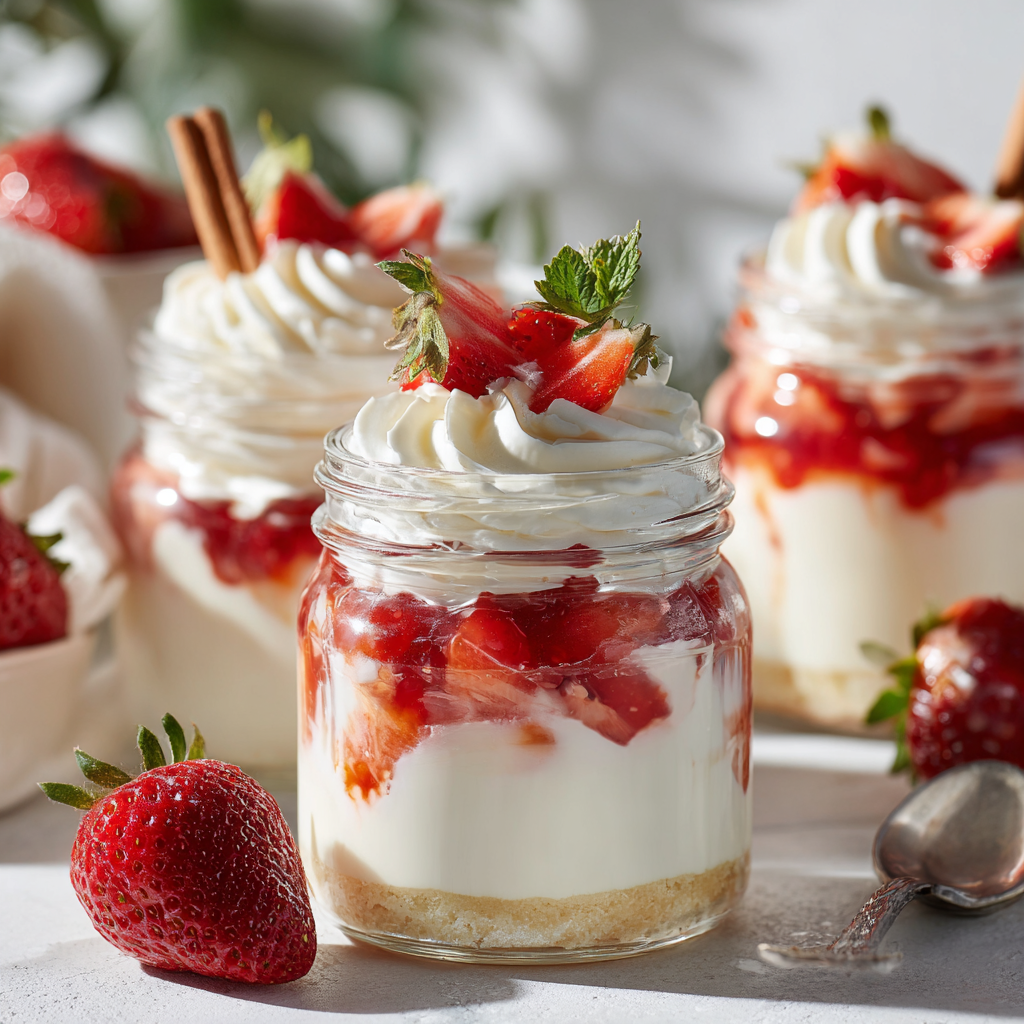
This chilling time ensures that the filling firms up beautifully, creating that classic creamy-yet-dense cheesecake texture. Once thoroughly chilled, your Greek yogurt cheesecake is ready for its fresh final touches. Top each one with vibrantly sliced strawberries and honey just before you plan to enjoy them.
Before You Serve
When your Greek yogurt cheesecake is fully cold from the refrigerator and perfectly set, it’s time for the finishing touches. This is when you add the vibrant sliced strawberries and a delicate drizzle of honey. These toppings add a wonderful freshness and a touch of sweetness that perfectly complements the tangy cheesecake.
It’s important to wait until just before serving to add the fresh strawberries and honey. This keeps the fruit at its freshest and prevents the honey from soaking in too much before you have a chance to enjoy the full experience. Since this recipe does not involve reheating, simply prepare your toppings and serve cold.
Frequently Asked Questions
Does Greek yogurt cheesecake use cream cheese?
No, this particular recipe for Greek yogurt cheesecake is made specifically without cream cheese. It relies entirely on 2% plain Greek yogurt for its creamy texture and tangy flavor profile.
Does it need to chill before serving?
Yes, chilling is a critical step for this cheesecake. After baking and cooling to room temperature, it needs to be refrigerated until it is fully cold and set to achieve the desired texture.
What kind of Greek yogurt should be used?
This recipe calls for 2% plain Greek yogurt. Opting for plain ensures you control the sweetness, and the 2% fat content provides a good balance of richness and lightness for the cheesecake.
Embrace the Simplicity
This Greek yogurt cheesecake truly shines in its elegant simplicity, offering a satisfying dessert experience without excess. By whisking the filling until smooth, baking until it’s perfectly set, and allowing ample time for it to chill fully, you create a treat that is both comforting and distinctly delicious. Topped with fresh strawberries and a touch of honey just before serving, it’s a lovely way to conclude a meal or enjoy as a thoughtful start to your day.
Print
Greek Yogurt Cheesecake
- Total Time: 36
- Yield: 2 servings
- Diet: Vegetarian
Description
A light, tangy cheesecake made with Greek yogurt as a cream cheese substitute. Baked in mini jars and topped with strawberries and honey, this small-batch dessert is perfect for breakfast or a refreshing treat.
Ingredients
1 cup 2% plain Greek yogurt
1/3 cup granulated sugar
1 large egg
1 egg white
1/2 teaspoon vanilla bean paste or 1 teaspoon vanilla extract
1 1/2 teaspoons cornstarch
2 cups strawberries, cored and sliced
Drizzle of honey (optional halal-certified source)
Instructions
Preheat oven to 375°F
Lightly grease two small jars or ramekins
Whisk together Greek yogurt, sugar, egg, egg white, vanilla, and cornstarch until smooth
Divide mixture evenly between jars
Bake 26 minutes or until set
Cool to room temperature
Place 1 cup of sliced strawberries in each jar
Add a drizzle of honey before serving
Chill until cold
Notes
Use halal-certified vanilla if required
Strawberries can be substituted with blueberries or peaches
Chill completely for best texture
Improve binding by chilling in refrigerator for 2+ hours
- Prep Time: 10
- Cook Time: 26
- Category: Deserts
- Method: Baking
- Cuisine: American


